The 10th version of MicroFocus’ Data Protector had introduced the ability to communicate with the software using REST API. MicroFocus advertises this feature as the key one in this version, but there is no document how to start working with this technology, and even the Tech Support seems not to be trained enough (I had asked them for help). In this paper I would like to focus on the security mechanism used behind, starting from “reverse” direction and to show the possibility of usage and calling the API.
According to the (poor) API documentation which could be accessed by DataProtector GUI (Help->API Documentation), each of API calls has to be authorized using access token. That is the main target.
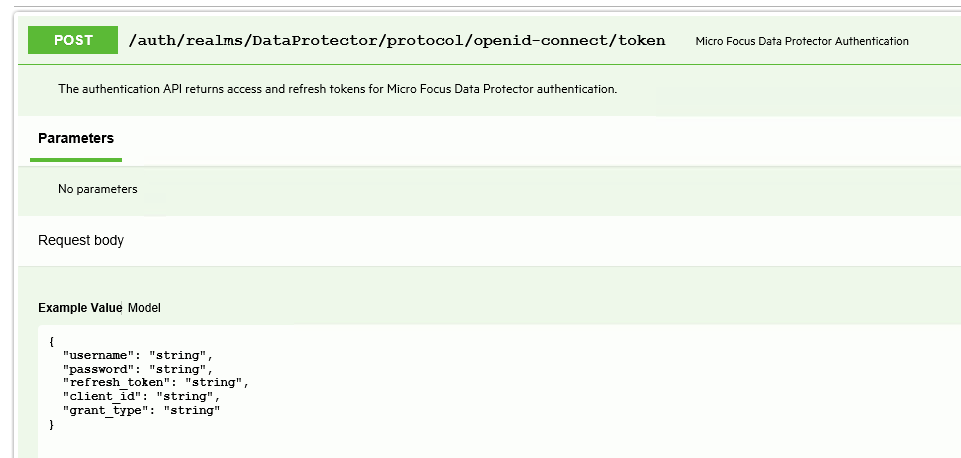
To get the authorization token we have to call the /auth/realms/DataProtector/protocol/openid-connect/token
which allows these data as the input:
{
„username”: „string”,
„password”: „string”,
„refresh_token”: „string”,
„client_id”: „string”,
„grant_type”: „string”
}
Of course, before first slash we have to provide network address/IP of our server. It could be taken from the API documentation address (in our case: https://OUR-SERVER:7116/dp-apis/index.html)
The problem here is – we do not know any of these and we even do not know where we can get them. The tip is in the API call – “openid-connect” which shows that there is used common and popular standard of authentication, named OpenID. OpenID is an extension of OAuth2 framework, which simplifies the usage.
OAuth2 accepts many models of providing authorization. Proper setting of grant_type is choosing the model. Available settings are:
- authorization_code: request a new OAuth2 token by providing parameters: client_id, client_secret, code and redirect_uri
- client_credentials: request a new app admin or anonymous token by providing parameters: client_id and client_secret
- password: request a new user token with the user credentials by providing parameters: username and password.
- refresh_token: as name describes, for refreshing current token. The parameter needed is refresh_token.
We would like to get a completely new user token, and as DataProtector API allows sending username and password we are sure that we have to do following actions:
- Token request has to be created by calling „grant_type”: „password”
- Get the possibility to create the username and password to create token request. How?
The solution for a second point is to use the “reverse thinking” method once again. We can go two different ways:
- Ask google for the API address, but with removed “DataProtector” string. Third answer is a great tip – it is exactly the same address as we use. As we can see the technology used behind is Keycloak. We can use similar method to get to know what the address of the tool’s administration console is – http://OUR-SERVER:8080/auth. In our case port is different, so we can feel free to replace it.
- Try to cut the address’ elements one by one. When we reach to /auth only, the Keycloak webpage opens:
Keycloak is an open source identity and access management solution, which could authenticate users by many methods, such as OpenID. This looks as the best place to create a user for authentication. The question here is – how can we get into admin panel, without knowledge and initial user and his password? The admin username and password is created automatically during the installation without any notice, and any changes may cause a general system failure. We can ask MicroFocus support directly or try to Google it with phrase “:7116/auth password”. Both ways provides us to the same document[1], which describes the following symptom:
Data Protector GUI shows error message “Unable to get Authentication token. Check if Appserver is running.”
We have to go to the desired paragraph by searching the same phrase as included in Google query. The containing section is a tutorial how to get the password for user “master_admin” in Keycloak. In this case we have to follow the procedures:
- Create SQL statement and save it on the server as test.sql:
select * from dp_config_host_credentials;
(the two which left are not necessary)
- Call this SQL statement by running the following command on elevated prompt and wait for result:
omnidbutil -run_script test.sql –detail

- We have to decode the password for user master_admin. It’s possible using the command:
util_cmd –decode <encoded password from “password” column>
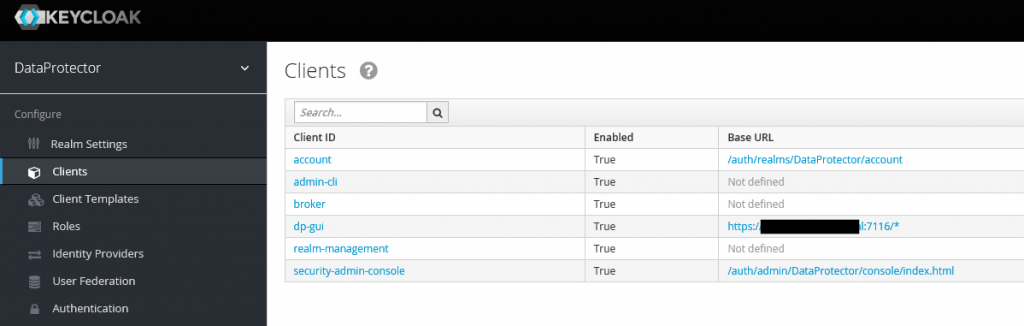
As we decoded the password, now we are able to get into Keycloak administration console. The interesting section for us is the “Clients” one, where we have a list of the clients, which are using Keycloak as authentication service. One of them – dp-gui – is binded to port 7116, which is used by the REST API we would like to connect. In our case dp-gui will be put as a “client_id” during authorization.
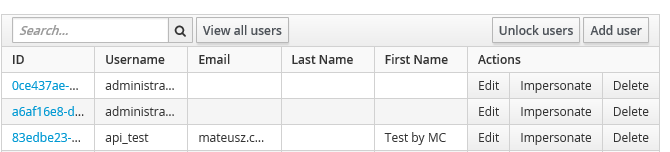
Now is the turn to create user. In Keycloak we have to select Users and click on New, and we have to fill each of the tabs by the data which is dependent on our needs. The most important thing here is to turn off the requirement of change password after first use and to assign user to role “admin”, as we would like to perform all actions using this account.
For testing purposes, I had created the api_test user.
Then we can go to final part of authorization, trying to call REST API by PowerShell script (required version >=3.0). In the Invoke-RestMethod’s body we put the required data (username, password, client_id and grant_type). Please keep in mind that if there are special signs in the password (such as “@”) they have to be replaced with the HTTP equivalents (for example: “@” “%40”)
$header = New-Object „System.Collections.Generic.Dictionary[[String],[String]]”
$header.Add(„Content-Type”,”application/x-www-form-urlencoded”)
$header.Add(„Accept”,”application/json”)
$header.Add(„Charset”,”UTF-8″)
[Net.ServicePointManager]::SecurityProtocol = [Net.SecurityProtocolType]::Tls -bor [Net.SecurityProtocolType]::Tls11 -bor [Net.SecurityProtocolType]::Tls12$login = Invoke-RestMethod -Uri 'https://OUR-SERVER:7116/auth/realms/DataProtector/protocol/openid-connect/token’ -Body „username=api_test&password=PASS&client_id=dp-gui&grant_type=password” -Headers $header -Method POST #-Body $message
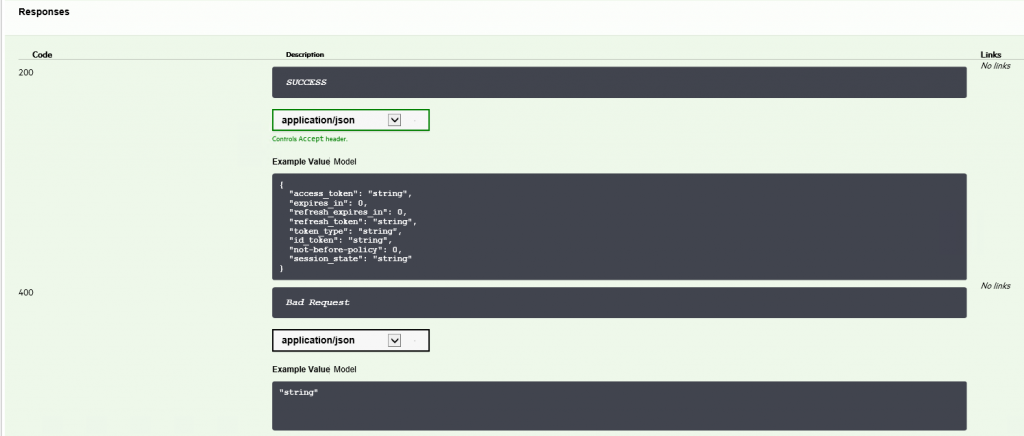
If there was no answer after executing this command, it means it had been finished successfully. When we call $login variable we should get all of the details:
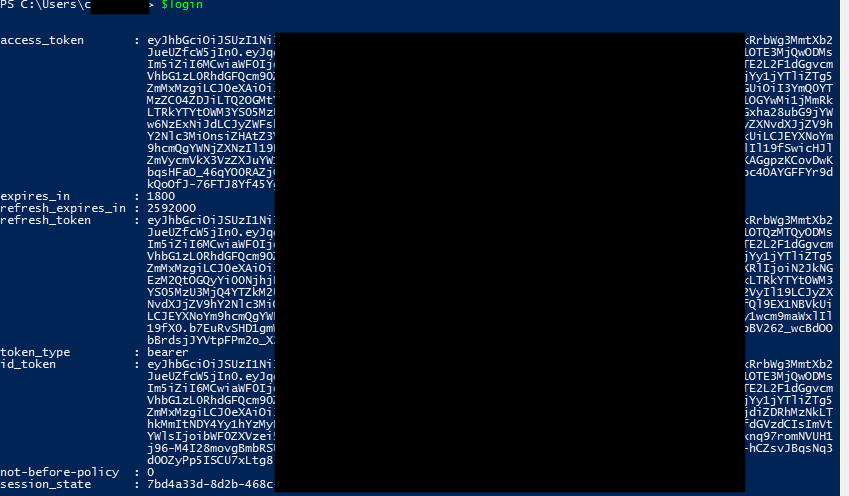
This means we got the correct access_token and we can to authorize ourselves by token_type = bearer. To perform this action we have to create new header:
$authorization = New-Object „System.Collections.Generic.Dictionary[[String],[String]]”
$tmp = „Bearer „+ $login.access_token
$authorization.Add(„Authorization”,$tmp)
Right now, we are able to call any of the REST API available commands. As an example, I would like to receive a list of all DataProtector clients:
$result = Invoke-RestMethod -Uri 'https://OUR-SERVER:7116/dp-config-server/restws/v1/clients’ -Headers $authorization -Method GET #-Body $message
$result.client | out-gridview
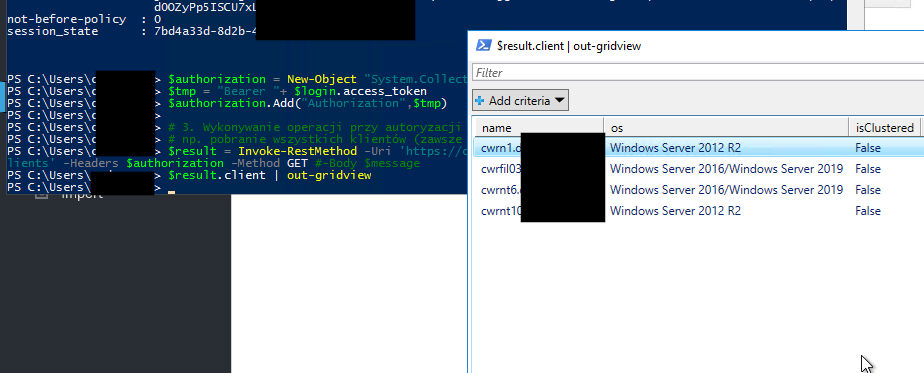
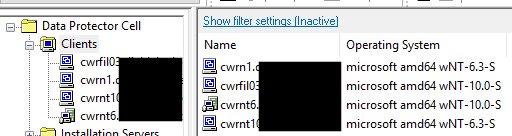
We can compare the list to the provided by GUI – it’s the same.
Of course, we can reuse the header in next calls until it have not been expired.